Jumat, 03 Mei 2024
Tugas Pendahuluan 2
== Percobaan 4 ==
- Rangkailah seperti rangkaian berikut
- Buka Arduino IDE dan masukan listing program
- Upload program ke arduino
- Variasikan kondisi keypad dan amati keluarannya pada LCD
1. Arduino Uno

2. Keypad

3. LCD

4. Power supply

5. Ground

Diagram Blok:


Prinsip Kerja:
Berdasarkan gambar di atas, ketika keypad pada arduino master ditekan maka dengan komunikasi di arduino slave akan diproses yang nantinya akan muncul tulisan pada LCD. Inputan berupa keypad dan output berupa LCD. Ketika tombol 1-9 ditekan pada keypad maka akan muncul tampilan di LCD sesuai tombol yang ditekan
Flowchart:
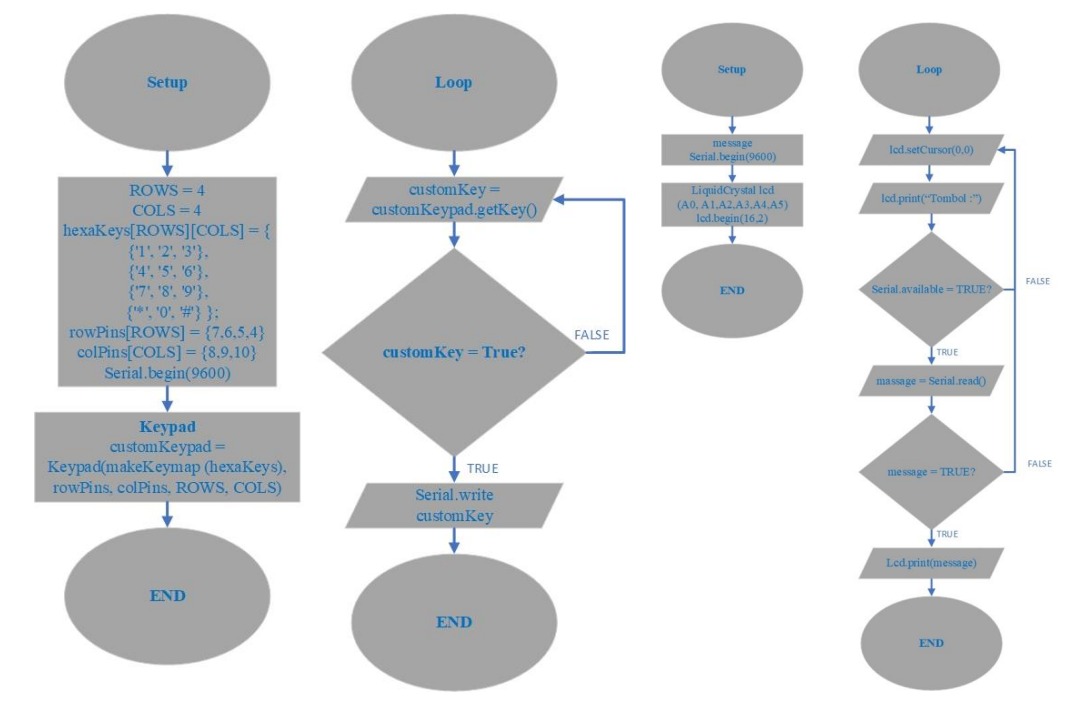
Listing Program:
- Arduino Master
#include <Keypad.h>
const byte ROWS = 4;
const byte COLS = 3;
// Array to represent keys on keypad
char hexaKeys[ROWS][COLS] = {
{'1', '2', '3'},
{'4', '5', '6'},
{'7', '8', '9'},
{'*', '0', '#'}
};
byte rowPins[ROWS] = {7, 6, 5, 4};
byte colPins[COLS] = {8, 9 , 10};
// Create keypad object
Keypad customKeypad = Keypad(makeKeymap(hexaKeys), rowPins, colPins, ROWS, COLS);
void setup()
{
Serial.begin(9600);
}
void loop()
{
char customKey = customKeypad.getKey();
if (customKey)
{
Serial.write(customKey);
}
delay(20);
}
- Arduino Slave
#include <LiquidCrystal.h>
LiquidCrystal lcd(A0, A1, A2, A3, A4, A5);
char message;
void setup()
{
Serial.begin(9600);
lcd.begin(16, 2);
}
void loop()
{
lcd.setCursor(0, 0);
lcd.print("Tombol :");
if (Serial.available())
{
message = Serial.read();
if (message)
{
lcd.print(message);
}
}
}
Modul 3: Percobaan 4 tanpa kondisi


